Sunday 30 March 2014

Week 6

Hi!
This week I chose hot colours.
They include
Cornus sibirica stems (with its leaves),
Euphorbia
Wall flowers
And Tulips.
It's very pretty and smells amazing too!

Mrs Green Fingers (MGF)

A Scented Bouquet | Mother's Day

Hi!
So it's mother's day today and I decided to try flower arranging out and see what I could make. Flower arranging is quite easy but if you're not gentle and willing, like me, it will prove to be quite challenging.
This is my little bouquet:
To make this, I used a small vase, secateurs and some flowers.
The flowers I used were hyacinths and forget-me-nots.
I stripped the leaves of the forget-me-nots that would go under the water and trimmed the stems down. Then I picked up the bunch and placed them in the vase (with water inside). Next I just fiddled with the arrangement until I was happy and then displayed it on a table.
Happy arranging!
Miss Chubby Fingers (MCF)

Monday 24 March 2014

Week 5

Spring is in the air!
The garden is full of daffodils, hyacinths are opening and the perfume is spreading through the garden.
This arrangement is a simple collection of 3 different woody plants:
The green and yellow speckled leaves are of Acuba Japonica,
Mahonia flowers and leaves,
And sprigs of Forsythia.
It smells lovely!

Another of the Amaryllis bulbs is blooming, this one is called Susan or Suzanne, the petals have a lovely shimmer inside!

Enjoy the garden!

Mrs Green Fingers (MGF)

Sunday 23 March 2014

I love you.. Card | Mother's Day

Hello again!
So as you know, mother's day is coming up soon and I was planning to do a gift, card and a treat. Last week I made a wool wrapped bottle and this week I'm making a card. This card is really cute and simple and I hope you like it!

You Will Need:

  • A glue stick
  • Ruler
  • Pencil
  • Pen
  • Scissors
  • Two sheets of card/paper, different colours


First, Fold one sheet in half. This sheet will have the start and end of the message on.

Then trace around your hand.

Cut around the hand tracing. Two hands should come out as you folded it in half.

Then write 'We love you..' or 'I love you...' on the front of one.

And then 'Love from...' on the other one. Make sure the hands line up correctly.

Then cut a strip out of your other card. Mine was around 1".

Cut the strip out.

Accordion fold your strip...

And cut of the tail.

This is what it should look like when you stretch it out.

Then Write 'This much!' on the strip.

Apply some glue on the two flaps on the side.

Stick it to the back of your hands.

This is what it should like!

This is a really nice little card which is really easy to make. It's really sweet and I really enjoyed making it. Make sure you line both hands up. Also, you can write a personal message on one of the hands!
Miss Chubby Fingers (MCF)

Links

Sunday 16 March 2014

Week 4

Goodbye winter, welcome spring.

Because this is the last weekend of winter 2014, I thought I should include some of the plants that have done well over the last weeks.
The heathers have been in flower for months, coloured leaves of Heuchera and Heucherella have amazing colours, the camellia has been smothered in flowers for at least 3 weeks now and last but not least, the pink hyacinth that smells amazing.


The Heuchera and Heucherella stone urn that I have in the front garden has been like this since last autumn & next to it you can see the narcissus tete-a-tete. 


The lovely crocuses that we planted to naturalize in the lawn outside the patio door have flowered since the end of January (my favourite is the stripy one).


Weather is warming up.
Welcome Spring.
Mrs Green Fingers (MGF)

Wool Wrapped Bottle | Mother's Day

Hi!
Mother's Day is approaching and I thought it was time to start making gifts and cards. This craft is really fun and addicting! It's really easy and you can be as creative as you like!

You Will Need
  • Paintbrush
  • Scissors
  • Glue
  • Wool in different colours
  • Newspaper
  • An empty glass bottle
TIP>> The neck of the bottle is hardest so try and pick an easy bottle for your first bottle and don't give up!


First, choose your wool.

Then apply a thin layer of glue onto the end of the bottle.

Start to wrap the wool. Try to keep it tight. Keep all the ends at the back of the bottle and change the amount of wrapping you do to give it a nice effect.

Keep doing this until you reach the top of the bottle. You may need to go over the ends with more glue. This is what my first bottle looks like!

This redecorated bottle can be used as a vase so, to finish it all off, add some flowers or leafs and pop on your windowsill or dining table!
Miss Chubby Fingers (MCF)

Links
Wrapped Bottle


Sunday 9 March 2014

The 4 Knots

Hi!
One of the things I have been meaning to show you are the four knots. There are actually five, but they are originally called the four knots.
These are knots that you tie and, if you do them correctly and in the right order, you'll find yourself with a beautiful knotted bracelet! And don't worry, there are only five knots that I'm going to show you today!
Today I am just going to show you the knots and then in the future I will do a tutorial on each individual bracelet.
I am also going to add a 'You Will Need' in case you ever want to practise the knots.

You Will Need

  • String or floss in two colours
  • A clipboard or tape and a flat surface
  • Scissors

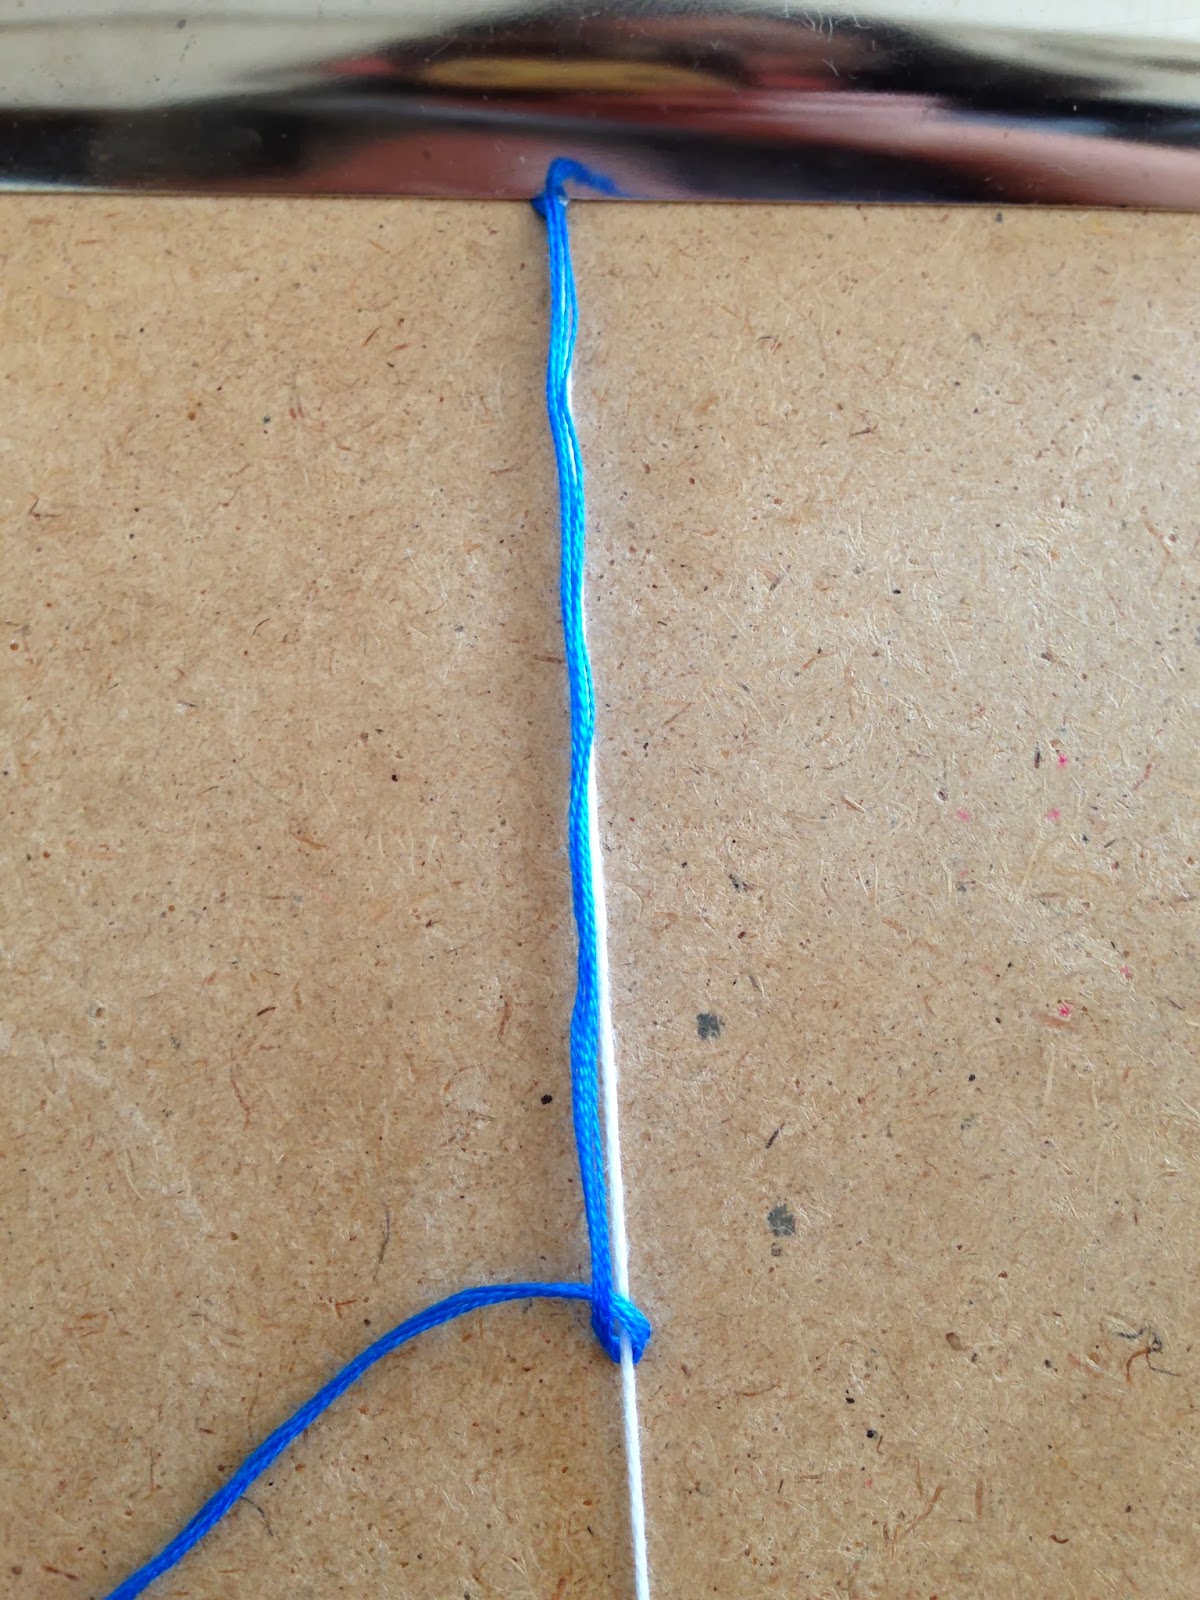
The first knot is the overhand knot. This isn't actually one of the four knots but you need it to start and finish knotted bracelets so I included it in. Firstly, you want to make a loop out of you string, using only a small amount from the top.

Then pull the tail through the loop,

And pull tight.

Then put the string in your clipboard or tape down where the knot starts.

The next knot is called the forward knot. It's called the forward knot because it's a forward '4' shape. You get the left-most string and pull it over the string next to it in a four shape.

Then pull the tail into the loop..

And pull tight!

Then repeat this again. Each individual knot needs to have two 'fours' pulled tight.

This is what the forward knot should look like. Notice the white string (the left-most string) is now on the right of the string it was knotted around.

The next knot is the backwards knot. It is the exact same as the forward knot; just the other way round. Make a backwards four..

And pull it up tightly.

Repeat this again.

This is what the backwards knot looks like. Notice the white string is now on the left of the string we knotted it around.

The next knot is the forward-backward knot. To do this, you do half a forward knot and half a backward knot so make a forward four..

And pull up tight.

Then make a backwards four.

And pull up tight!

This is what a forward-backward knot looks like. Notice the leftmost string is till on the left.

Now for the backward-forward knot. All you need to do is half a backwards knot and half a forwards knot. So make a backwards 4..

And pull it up tightly (being different!)

Then make a forward knot..

And pull it up making sure its tight!

This is what a backward-forward knot looks like. As you can see, the blue string is still on the right.

Then finish everything of with another overhand knot, shown at the top.

Hope this was clear and I will be putting on some bracelets in a few weeks. Until then, practise these knots. The overhand, forward and backward knots are the most common and are used very often. The forward-backward and backward forward knots are used, just in more complex patterns. 

Miss Chubby Fingers (MCF)